
By: Jonny Graham | Updated May 2026 | 10 min read time
Learn how to power your Campervan Fuse Box with a portable power station. We compare Bluetti hubs, EcoFlow Power Kits, and DIY Victron setups.
If you’re working on a campervan conversion, you might have encountered this issue. You’ve bought a powerful portable power station, but wiring it into your van’s 12V fuse box isn’t straightforward.
Most power stations have a standard 12V cigarette lighter port, but it’s not meant for permanent wiring. It works for things like charging your phone or running a coolbox on short trips. If you try to run a diesel heater, compressor fridge, water pump, and lights all at once through that port, it will quickly overload and shut off.
This guide covers three ways to connect a portable power station to a 12V campervan fuse box, including both plug-and-play hubs and traditional DIY setups.
The Cigarette Lighter Port Problem
Almost every portable power station includes a 12V DC output port (often labelled “car port” or “cigarette lighter socket”). This port works fine for light-duty applications, but it has a major limitation for campervan use:
The 10-amp ceiling.
Most 12V DC ports are capped at 10 amps maximum (120 watts at 12V). Exceed this limit, and the power station shuts the port down to protect its internal circuitry.
Here’s why 10 amps isn’t enough for a campervan:
Diesel heater startup: Chinese diesel heaters (Webasto-style units) draw 10-15 amps during the glow plug ignition phase. This alone maxes out that cigarette port (which we wrote about in detail here).
12V compressor fridge: Quality absorption fridges pull 4-6 amps when the compressor cycles on. Add this to a heater running simultaneously, and you’re well over 10 amps.
Water pump and lighting: A decent water pump draws 3-4 amps under load. LED lighting adds another 1-2 amps across multiple circuits.
Add these up, and you’re using 18-25 amps, which is twice what the cigarette port can handle. As soon as several appliances run at once, the port shuts off, and everything loses power.
To power a campervan fuse box, you’ll need a steady 30-50 amps of 12V output. This means you have to avoid using the cigarette port.
Solution 1: Bluetti Hub Systems
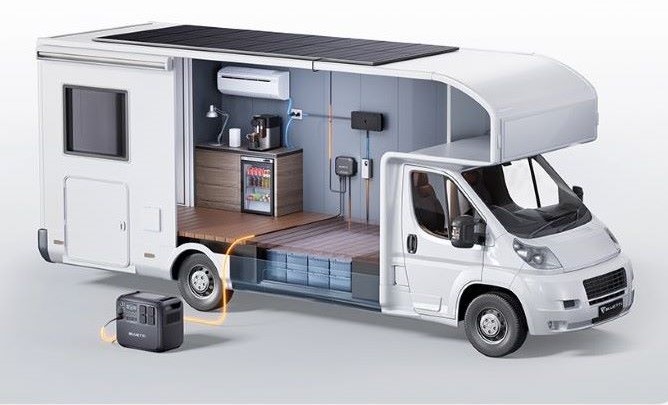
Bluetti manufactures dedicated hardware that connects portable power stations to hardwired 12V systems.
D1 DC-DC Enhancer
The D1 is designed for use with mid- to large portable power stations, such as the AC200 series and the Apex 300.
How it works: The D1 connects to the power station’s high-voltage DC output port (not the cigarette lighter). It steps this voltage down to a stable 12V output capable of delivering 30 amps continuously.
Installation: Run heavy-gauge cables (10 AWG minimum) from the D1’s output terminals directly to your blade fuse box inputs. This completely bypasses the weak 10-amp cigarette port.

Bluetti D1 DC-DC Enhancer
Best for: Those who want a simple upgrade path to high-amperage 12V distribution.
Recommended Power Stations. Bluetti Apex 300, AC200L & AC200MAX
→ Read Full Bluetti Apex 300, AC200MAX, AC200L Comparison
RV5 Power Hub
For permanent, larger-scale conversions, Bluetti offers the RV5—a 48V system hub that acts as the central distribution point.
What it does: The RV5 combines a solar charge controller (MPPT), DC-DC alternator charging, and inverter functions into a single compact unit. It handles power distribution to your 12V fuse panel and manages multiple charging sources simultaneously.
Installation: Fix and secure the RV5 to the van wall. Connect your solar panels, alternator feed, and shore power connections to the hub’s inputs. Wire the 12V output to your fuse box. The hub manages everything automatically.

Best for: Full-time off-grid living requiring integrated solar, alternator charging, and high-capacity battery banks.
Solution 2: EcoFlow Power Kits
EcoFlow pioneered the modern “plug-and-play” van electrical system with their Power Kit ecosystem.
The Power Hub
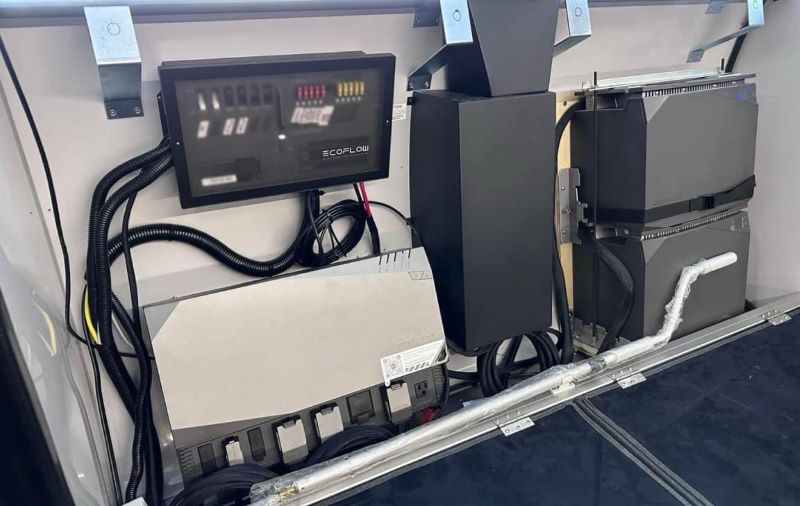
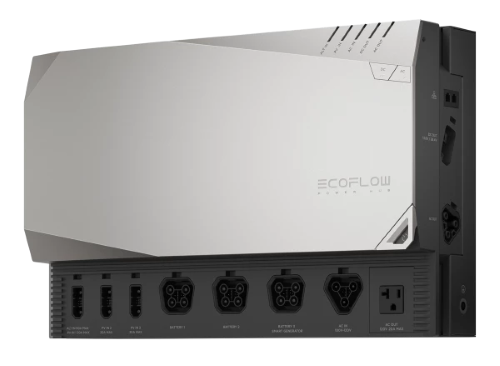
Rather than buying a standard portable power station, you install EcoFlow’s dedicated Power Hub—a wall-mounted unit that houses your inverter, solar controllers, and alternator chargers in one integrated enclosure.
Key advantage: The Power Hub connects directly to EcoFlow’s Smart Distribution Panel, which replaces a traditional blade fuse box. This panel provides clearly labelled circuits for fridge, lights, heater, and water pump—no complex wiring diagrams required.
Installation process:
- Mount the Power Hub to your van wall.
- Connect EcoFlow’s proprietary batteries via a single thick cable.
- Attach the Smart Distribution Panel.
- Wire your appliances to the panel’s labelled terminals.
- Connect the solar panels and the alternator feed to the hub’s inputs.
The system works right away. You don’t have to crimp lots of cables, figure out voltage drops, or worry about choosing the right fuse sizes.
Best for: Self-builders prioritising simplicity and speed over maximum customisation. Ideal if electrical work isn’t your strength but you want expert-level results.
How Power Hubs Manage Charging
Both Bluetti and EcoFlow hubs act as the central brain for managing multiple charging sources. This is their core advantage over standard portable power stations.
Solar Power (MPPT Controllers)
Both hubs include built-in MPPT (Maximum Power Point Tracking) charge controllers. Connect your roof-mounted solar panels directly to the hub’s solar inputs.
The MPPT controller continuously monitors the solar panel’s voltage and current, continually adjusting the load to extract maximum power regardless of weather conditions. On a partly cloudy day, this can mean 20-30% higher charging efficiency than with basic PWM controllers.
Alternator Charging (DC-DC Chargers)
When driving, your van’s alternator generates electricity. Power hubs include DC-DC chargers that connect to your starter battery.
The DC-DC charger stops your alternator from being overloaded and safely increases the charge going to your leisure batteries. If you drive for 2-3 hours, you can fully recharge a drained battery bank. This is especially useful for people who often travel in their vans.
Important: DC-DC chargers protect your van’s electrical system. Connecting a leisure battery directly to your starter battery without a DC-DC charger can damage your alternator or drain your starter battery to a dangerously low level.
Shore Power (Mains Hookup)
When parked at campsites offering mains electricity, plug the hub into 240V shore power. The hub’s built-in inverter/charger switches to mains charging mode, typically delivering the fastest charge rates (often 1000W+).
The hub can handle solar, an alternator, and shore power simultaneously. On a sunny day, while you’re driving to a campsite, it uses both solar and alternator charging for faster results. When you plug into shore power, it automatically switches to mains charging. You don’t have to do anything manually.
Solution 3: Traditional Victron Energy Setup
Before integrated hubs existed, the industry standard was building modular systems using Victron Energy components.
The Modular Approach
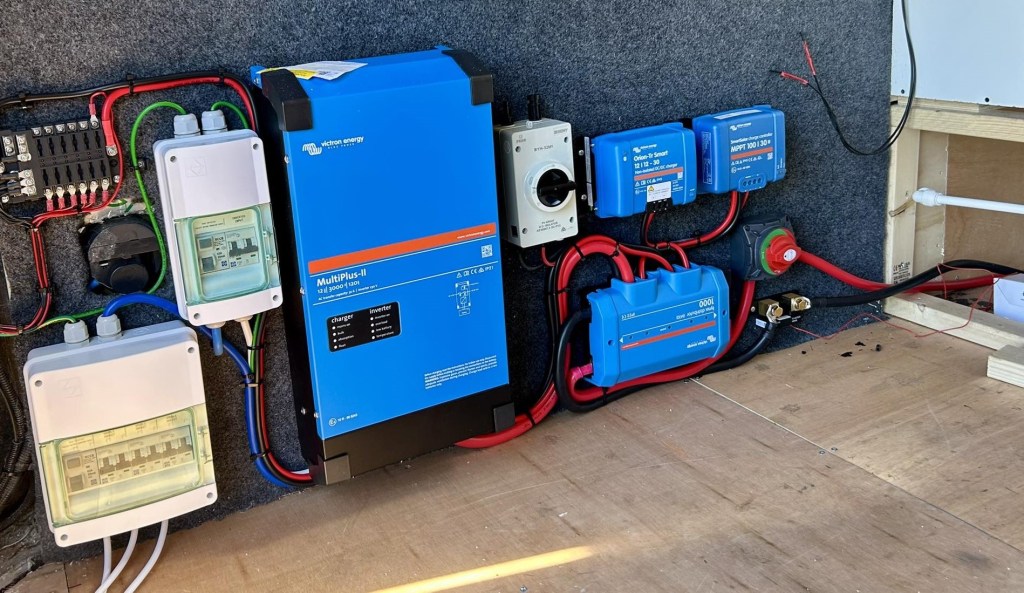
A Victron campervan system requires purchasing each component separately:
- MPPT solar charge controller (e.g., SmartSolar 100/30)
- DC-DC alternator charger (e.g., Orion-Tr Smart)
- Inverter/charger (e.g., MultiPlus 12/1200)
- Battery monitor (e.g., SmartShunt)
- Fuse boxes, busbars, and wiring
You’ll need to plan the system layout, select the appropriate wire sizes, crimp all connections, and ensure every part is fused correctly. All components connect to a standard leisure battery bank, typically composed of LiFePO4 cells.
Advantages
Modularity: If the solar controller fails, replace just that component. You’re not replacing an entire integrated hub.
Customisation: Complete oversight of system sizing, redundancy, and layout. Professional conversions often use Victron for this reason.
Repairability: Victron equipment is widely stocked. Parts are available globally, and any competent auto electrician can service the system.
Reliability: Victron components are built for marine and off-grid applications. They handle harsh environments better than consumer-grade equipment.
Disadvantages
Complexity: Calls for extensive electrical knowledge. You’re responsible for system design, wire sizing, fuse calculations, and troubleshooting.
Time investment: Plan for 3-5 days of steady work to wire a full Victron system. Each connection needs to be crimped, heat-shrunk, and firmly secured.
Skill barrier: A single incorrectly sized fuse or a loose connection can cause an electrical fire. This isn’t beginner-friendly territory.
Which Approach is Right for Your Build?
Choose based on your priorities:
Choose Bluetti or EcoFlow Hubs If:
- You want the installation completed in hours, not days.
- Electrical work isn’t your primary skill.
- You value plug-and-play simplicity over maximum customisation.
- You’re building your first campervan conversion.
- You want manufacturer support and warranties covering the entire system.
Trade-off: You’re locked into one manufacturer’s ecosystem. If the hub fails, you’re replacing a more expensive integrated unit rather than swapping a single component.
Choose Victron DIY If:
- You have electrical experience or are willing to invest serious time learning.
- You want maximum repairability and modularity.
- You’re building a high-end conversion and need specific component sizing.
- You plan to live full-time in the van and want serviceable components worldwide.
- The budget allows for quality individual components.
Trade-off: Significantly longer installation time, steeper learning curve, and higher risk of mistakes during the build phase.
Perspective: What Most Self-Builders Should Choose
Professional conversion companies use modular Victron setups for good reason: when a component fails mid-winter, they can diagnose and swap parts in minutes. Modularity matters for commercial operations.
But 95% of self-builders aren’t running commercial operations. You’re building one van for personal use.
For most DIYers, integrated power hubs (Bluetti or EcoFlow) are the smarter choice. Here’s why:
Safety: A properly engineered hub eliminates the risk of wiring mistakes. One undersized fuse or a poor crimp connection in a DIY system can cause an electrical fire. Hubs remove that risk entirely.
Time savings: Building a Victron system properly takes 20-40 hours. Hubs install in 2-4 hours. That’s a week of your time restored.
Support: If something goes wrong with a hub, you call the manufacturer. If something goes wrong with your DIY Victron build, you’re troubleshooting alone at 2 am in a layby.
Future-proofing: Modern hubs receive firmware updates that add new features. Your system improves over time without hardware changes.
The trade-off is less repairability in remote places, which is important if you’re planning long overland trips in areas without manufacturer support. For most people doing weekend trips or year-long tours in Europe, this isn’t a big issue.
You’re giving up the chance to make repairs in rare situations in exchange for safety and simplicity right now. For most people building their own vans, this is the better choice.
Final Recommendations
Best plug-and-play option: EcoFlow Power Kit (if building from scratch)
Best upgrade path: Bluetti D1 DC-DC Enhancer. For those who want a simple upgrade path to high-amperage 12V distribution.
Recommended Power Stations to pair with the Bluetti D1 DC-DC Enhancer( Bluetti Apex 300, AC200L & AC200MAX)
Best for professionals/experienced builders: Victron modular system
No matter which option you choose, the main goal is to provide safe, reliable 12V power to your campervan’s fuse box without being limited by cigarette lighter ports.
Begin by thinking about your own skills and how much time you have. Pick the system that fits what you can handle, not just the one that gets the most attention online.
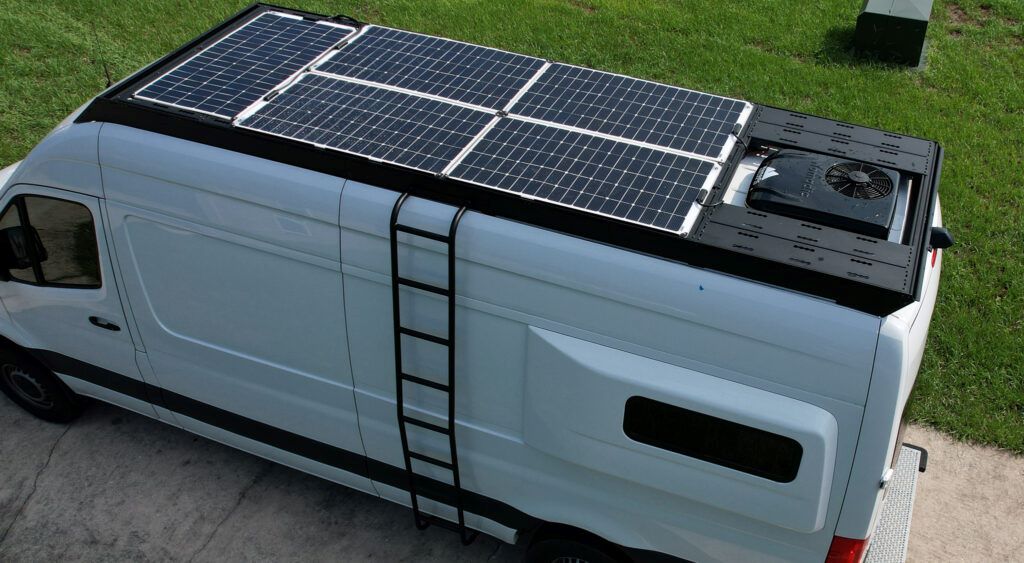
Ready to calculate your solar power needs? Use our Solar Panel Selector to size your roof array correctly. Just enter your power station type, and our solar panel selector will provide a custom list of the best-recommended solar panels and accessories.

Confused about how to wire your 12V fuse hub or connect everything together? You don’t have to guess. Download our free 12V Campervan Power Guide for complete colour-coded wiring schematics and interactive power audit worksheets- everything needed to design your off-grid system perfectly.
Questions & Answers:
What Size of Portable Power Station Do I need?
Getting the right size still depends on your exact appliances and your daily usage. To find out properly, try our free campervan calculator.
Campervan Calculator:
This will give you a more accurate recommendation based on your actual power needs.
Why can’t I just use the 12V cigarette lighter port on my portable power station for my campervan?
Most power stations limit their 12V cigarette lighter port to 10 amps (120W). This is fine for occasional use but quickly overloads when running a diesel heater, compressor fridge, water pump, and lights together. The port shuts off for protection, leaving you without power. Proper solutions like the Bluetti D1 DC-DC Enhancer bypass this port entirely and deliver 30–50+ amps continuously
What is the Bluetti D1 DC-DC Enhancer and who is it best for?
The Bluetti D1 is a DC-DC converter that connects to the high-voltage DC output of Bluetti power stations (like the AC200 series or Apex 300) and steps it down to a stable, high-current 12V output (30-50 amps continuous). It’s ideal for van owners who want a relatively simple, powerful upgrade.
What is the Bluetti RV5 Power Hub and when should I choose it?
The RV5 is Bluetti’s more advanced 48V integrated power hub designed for larger or full-time campervan conversions. It combines MPPT solar charging, DC-DC alternator charging, and power distribution in one unit. Choose the RV5 if you’re doing a serious off-grid build and want a central “brain” that manages multiple charging sources automatically.
How does the EcoFlow Power Hub compare to Bluetti solutions?
EcoFlow’s Power Hub is a wall-mounted all-in-one system that integrates the inverter, solar controllers, and chargers. It pairs with their Smart Distribution Panel for clearly labelled circuits. It’s often preferred by first-time builders for its plug-and-play simplicity and fast installation.

