
By: Jonny Graham | Updated May 2026 | 7 min read
If you’re just starting with off-grid power, solar panel specs might seem overwhelming. Words such as volts, amps, series wiring, and MC4 connectors can make it all feel a bit complicated.
The good news is that connecting solar panels is simple once you know a few basics. Whether you want to use a single portable panel by your tent or install multiple panels on your campervan roof, this guide will help you do it safely.
Understanding the Basics: Volts, Amps, and Watts
To keep your power station safe, you just need to know three key terms. Imagine electricity as water moving through a hose.
Voltage (V): Water pressure. Higher voltage = more push behind the electricity.
Amps (A): Flow rate. Higher amps = more electricity flowing per second.
Watts (W): Total power delivered. Calculated as Volts × Amps = Watts.
Remember: Never Exceed Maximum Voltage
Every portable power station has two important solar input limits; understanding them will help you safely connect your panels.
Maximum Voltage Limit: This is the most important rule. If you go over it, you’ll get an overvoltage error and could permanently damage the unit.
Check the user manual for the maximum solar input voltage of your power station. For example, the Anker Solix C1000X has a maximum solar input voltage of 60V.
That means the total voltage from your solar panels (when wired in series) must stay safely below C1000X’s 60V limit.
The typical operating voltage for most 200W portable panels is 18-22V. This means you can safely wire two 200W panels together with the C1000X. Always leave some safety margin below the 60V limit.
Maximum Amp Limit: This acts like a throttle rather than a strict barrier. If your panels make 15A but your power station only allows 10A, it just ignores the extra 5A. This is safe; you just won’t get to use the extra power.
Series vs Parallel Wiring: Which to Use?

When connecting multiple panels, you will usually choose between two wiring methods:
Wiring in Series
Connect the positive cable from Panel A directly to the negative output from Panel B.
Then connect the remaining negative from Panel A and the remaining positive from Panel B to your power station’s solar input (using MC4 cables or the appropriate adapter).
Result: Voltages add together, amps stay the same.
Best for: Keeping current (amps) low while delivering the most power. This is by far the most common and effective wiring method for two panels with power stations that have strict amp limits.
Wiring in Parallel
Use Y-branch adapters to connect all positive cables together and all negative cables together.
Result: Amps add together, voltage stays the same.
Best for: Keeping within voltage limits when wiring in series would go over them.
Connectors & Adapters: What You Actually Need
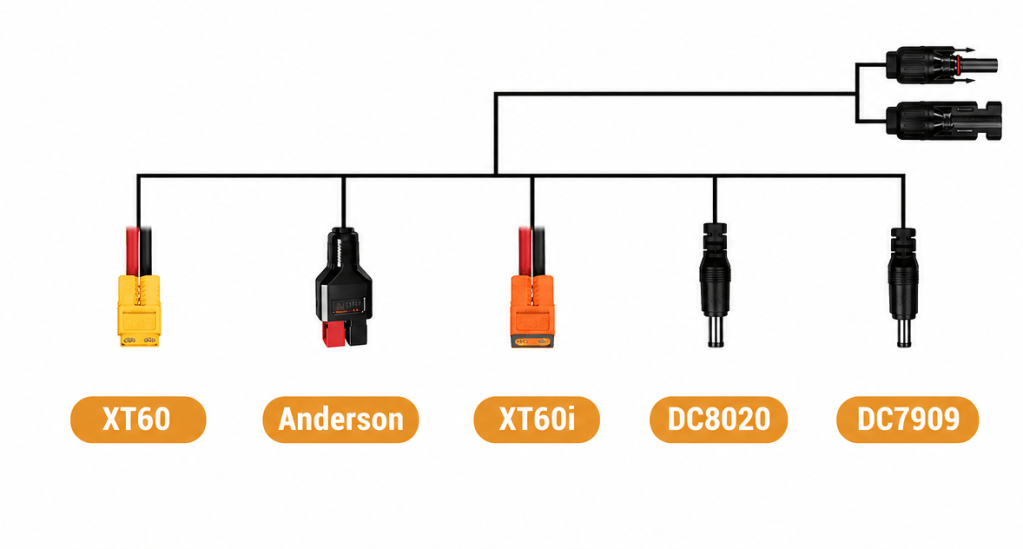
Almost all modern solar panels use MC4 connectors. These are strong, waterproof clips that snap together tightly.
Portable power stations usually don’t have MC4 ports, so you’ll need an adapter cable to connect your solar panels to the power station.
Common adapter types:
- MC4 to XT60 (newer mid-to-large units) e.g. Anker Solix C1000X
- MC4 to DC7909 / 8mm (older or entry-level units)
- MC4 to DC8020 (common on Jackery units)
Look at your power station’s manual to see which adapter cable you need.
Real-World Connection Examples
Here are three of the most common solar panel setups for portable power stations.
Example 1: Single Panel Portable Setup
Best for: Small units with strict voltage limits (e.g., Anker SOLIX C300, Anker 521, VTOMAN Jump 600X)
Smaller power stations usually have low-voltage limits, such as 28V or 30V. If you wire more than one panel in series, you’ll quickly get an overvoltage error.
Solution: Use a single 100W portable panel.
Connection:
- Run an MC4 extension cable from the panel.
- Attach your required adapter (e.g., MC4-to-XT60)
- Plug directly into the power station.
This is the simplest and safest setup you can use.
Example 2: Series Portable Setup
Best for: Mid-sized units with tight amp limits ( e.g. Anker SOLIX C1000X)
Many mid-sized power stations can handle high wattage but have strict amp limits, usually around 12.5A. Wiring panels in parallel can push you over 20A, causing the power station to limit your input and waste potential power.
Solution: Wire two 200W panels in series.
Connection:
- Connect the positive output from Panel A to the negative output from Panel B. Then connect the remaining negative from Panel A and the remaining positive from Panel B to your power station’s solar input.
- This series connection increases the total voltage from the two panels to about 44V, while keeping the amps low (around 9A).
- 44V is still safely below the 60V maximum that most portable power stations, like the Anker SOLIX C1000X, can handle.
Example 3: Permanent Campervan Roof Installation
Best for: RV Living or off-grid setups
The way you calculate solar power stays the same, but you’ll need different hardware to keep everything safe and secure while you’re driving.
The Required Hardware:
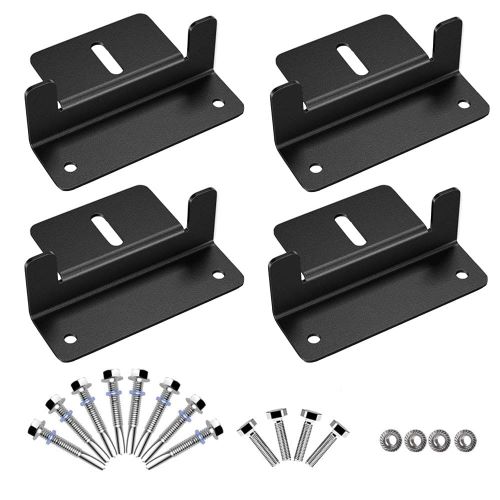
Solar Z-brackets: Bolt rigid panels permanently to your roof
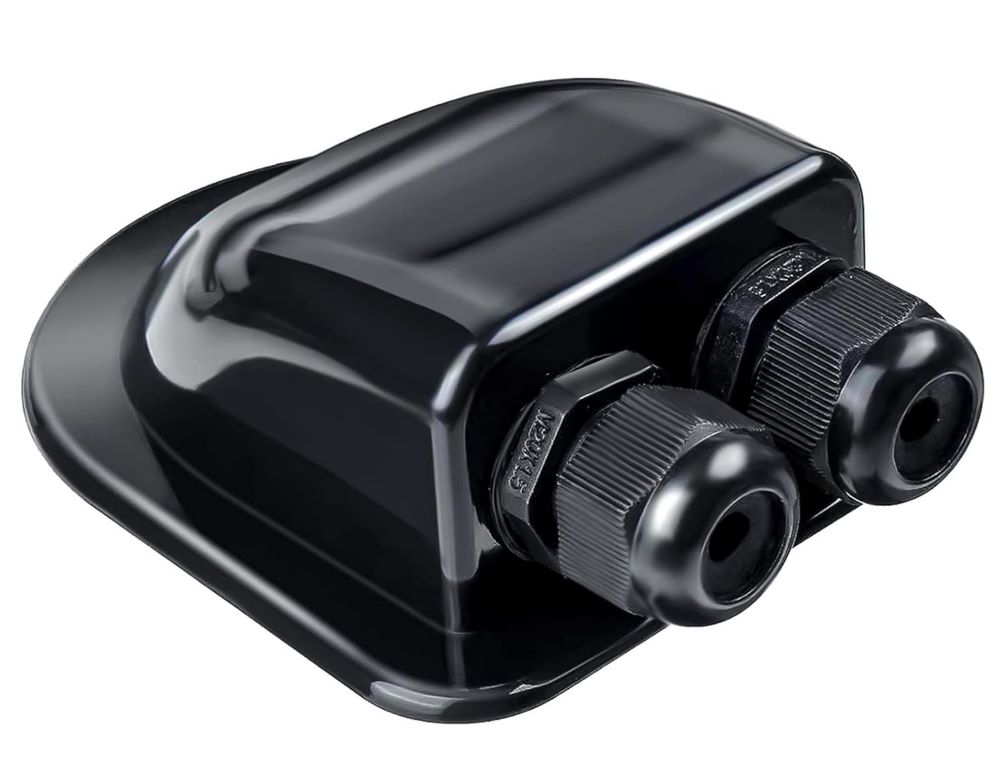
Waterproof cable entry gland: Sealed roof penetration for running wires inside
32A DC solar isolator switch: Acts as a circuit breaker, letting you safely disconnect roof power before plugging into your power station.

Installation process:
- Mount rigid panels to the roof using Z-brackets
- Cut an MC4 extension cable in half.
- Connect MC4 connectors to your roof panels.
- Feed bare wires down through the waterproof gland.
- Route wires to your DC isolator switch mounted inside the van.
- Connect the output from the isolator switch to your power station’s adapter cable.
The isolator switch is essential because it lets you turn off the roof power right away before you connect or disconnect your power station.
Common Mistakes to Avoid
Exceeding voltage limits: Always check your power station’s maximum input voltage before wiring panels in series. This is the most important rule to follow.
Using cables that are too thin: If your cables are longer than 5 metres, use cables that are thick enough to reduce power loss. Standard MC4 extension cables work for most setups.
Mixing panel types: It’s best to use the same type of panels when wiring in series. Using panels with different wattages or voltages makes things more complicated and less efficient.
Skipping the isolator switch in permanent installs: If you’re putting panels on a vehicle, always add a DC isolator switch. It’s a must-have for safety, not just a nice extra.
Calculate Your Perfect Setup
Now that you know the basics, you don’t have to do the calculations by hand.
We’ve made a free calculator to do the work for you. Just pick your power station model from the drop-down list, and it will supply you with a custom solar list that shows:
- The best panels, cables and accessories for your exact portable power station.
- Plus how to wire them up safely.
No guessing. No risk of overvoltage. Just a simple way to start connecting solar panels.
Final Thoughts
Connecting solar panels to a portable power station is easy once you know about voltage limits and wiring.
Start with something simple. One panel and the right adapter cable will get you off-grid power right away. You can add more later if needed.
Most importantly: respect the voltage limits, and always follow them.

